
After installing WordPress, there are a couple of things that you need to do. These are the basic steps that you do to customize your blog. These simple customizations will make your site friendlier to you, your visitors and search engines.
Familiarize yourself with the WordPress Dashboard
When you’ve just installed WordPress, the first thing you’ll want to do is get familiar with the WordPress dashboard.
It’s the control panel for your site, so you’ll be spending a lot of time in it throughout the rest of this post (and the rest of your site’s life).
You can access your WordPress dashboard by appending /wp-admin to the end of your site’s URL — for example, yoursite.com/wp-admin. If you haven’t already logged in, WordPress will prompt you to before you can view the dashboard.
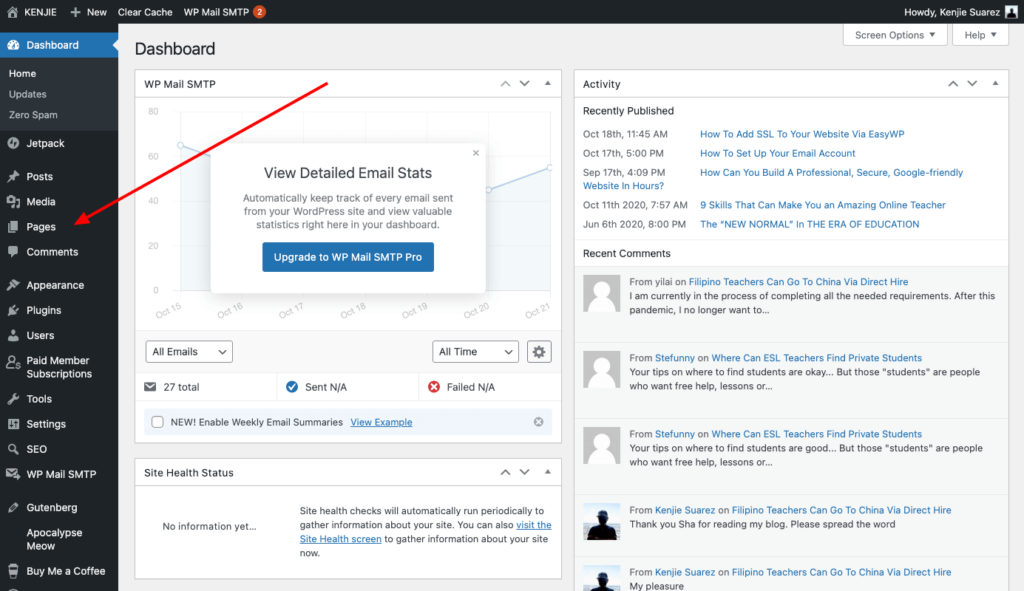
The main dashboard gives you a basic summary of your site. To access additional areas, you’ll use the sidebar menu on the left.

Each menu item on the left will also include a number of sub-menus when you hover over it.
To create new content, you’ll use the Posts and Pages menus:
- Posts — these are blog posts.
- Pages — static pages, such as your ‘About’ or ‘Contact’ pages.
To manage your site’s extensions, you’ll use the Appearance and Plugins menus:
- Appearance — install and customize your WordPress theme, which controls your site’s appearance.
- Plugins — install and manage your WordPress plugins, which add new functionality to your site.
Finally, when you’re just getting set up, you’ll spend a lot of time in the Settings area. However, once you configure all of the settings, you’ll mostly ignore this area in your day-to-day site management.
Once you feel comfortable working in the WordPress dashboard, you’re ready to dig in to the rest of these tips…
Change permalink structure
Your WordPress site’s permalink structure controls the part of your website’s URLs that comes after your main domain name.
For example, if the URL of a post is ‘yoursite.com/things-to-do-after-installing-wordpress‘, then the permalink structure controls the ‘things-to-do-after-installing-wordpress‘ part.
It’s an important consideration for both user experience and search engine optimization (SEO), because you can use the words in your permalinks to provide important context about the content of a post.

However, many fresh WordPress installs use an unoptimized permalink structure based on numbers, such as ‘yoursite.com/?p=123‘.
To fix that and choose an optimized permalink structure, you can go to Settings → Permalinks.
For most websites, the best option is to choose the Post name structure.
Choose your timezone
The timezone of your WordPress site plays an important part in scheduling and automation. For example, if you schedule a blog post to go live at some point in the future, the exact publish time will be based on the timezone in your WordPress settings.
The simplest option is normally to set it equal to your own timezone.

To set your timezone, go to Settings → General and use the Timezone drop-down. Below that, you can also configure some other time-related settings, such as your date and time format.
Fill in your user profile
To fill it in, go to Users → Your Profile. There, you can enter your name and biographical info:

When you publish a blog post, most WordPress themes include a small box at the bottom of the post that has more information about the author. This box gives you a chance to connect with your visitors and put a face to the content.
To control your profile picture, you’ll need to sign up for Gravatar using the email address associated with your WordPress account.
Configure commenting policy
By default, anyone can leave a comment on your blog posts. You’ll need to manually approve a person’s first comment, but after that they can comment freely.
Depending on the type of site you’re creating, you may want to use a different commenting policy. For example, you could:
- require users to register to leave a comment
- automatically close comments after a certain period of time.
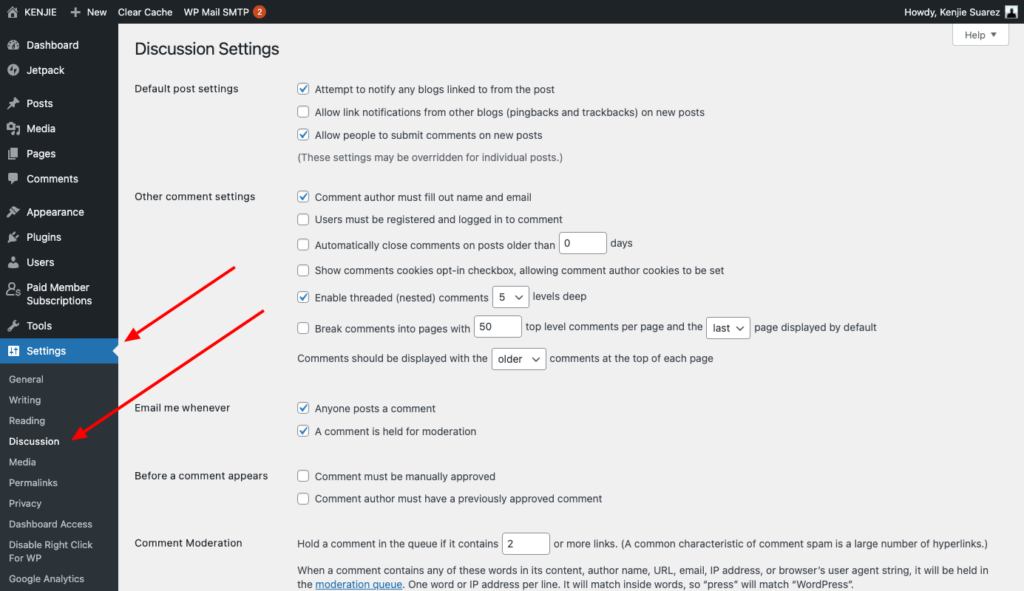
To adjust your site’s comment rules, or turn off comments altogether, you should go to Settings → Discussion.
In addition to controlling who can comment, you can also set up comment moderation rules to make your life easier:
Remove the “Hello World” Post and “Sample Page”
After installing WordPress, you will see that you have two content—a post and a page—in your blog. You will want to remove these two default or demo post and page. You need to send them to trash and delete them permanently.
Here’s how:
- Open the Posts and Pages area.
- Hover over the existing content.
- Click the Trash option to delete a piece of content.
You don’t want them on your website.
Create the basic pages
Your site needs some basic pages like contact us, about us, terms of services and privacy policy. Create them as new pages.
To create a new page, go to Pages → Add New. There, you can use the block editor to add content and control the layout of your page.
Change the General Settings

From WordPress Dashboard go to > Settings > hover over to General > and edit the Site Title and Tagline fields. These steps are important for SEO because both site title and tagline are visible in the search engines. Since SSL has already been configured, changing http:// to https:// is also a must.
Under Membership, if you don’t want people to register, don’t tick the “Anyone can register” box. If you are going to allow guest posting, membership (like I do on my website), then be prepared to get a lot of spam registrations. However, you can fix that with the help of a plugin.
By the way, a WordPress plugin is a piece of software that “plugs into” your WordPress site. Plugins can add new functionality or extend existing functionality on your site, allowing you to create virtually any kind of website, from ecommerce stores to portfolios to directory sites.
Change the Reading Settings
Let’s go through the options that might be difficult to understand and need extra info.
- Your homepage displays:
- Your latest posts – Select this if you have a standard blog, and you want your latest posts to appear on the homepage. Some WordPress themes might require a static page to be created instead;
- A static page – Select this if you have a website, and your homepage is a static page, such as a landing/presentation page. You have to create one (e.g. Home) in Pages, then select it.

- Blog pages show at most – It refers to the maximum number of posts that you want your blog page to display.
- Syndication feeds show the most recent – “Syndication feeds” refers to your WordPress feed, which you can see by adding
/feed/after your domain (e.g.https://example.com/feed/). Some browsers only show raw code. I do not pay much attention to this.
Make sure that in the Search Engine Visibility the Discourage search engines from indexing this site is ticked off.
Delete Pre-installed/Unused Plugins
A default WordPress installation comes with two pre-installed plugins:
- Hello Dolly – Useless;
- Akismet – An anti-spam plugin that you can keep, but I don’t recommend it. There are better, lighter alternatives, such as Spam Destroyer. At least until you get a ton of traffic.
Certain software or platforms that install WordPress automatically could also add extra plugins that you might not need.
There are also cases where your WordPress installation will come with handpicked plugins for that particular WordPress theme. In those cases, you should probably not delete them.
So, to delete pre-installed WordPress plugins that you don’t need, go to Plugins > Installed Plugins.
Check the box next to Plugin to select them in bulk, select Delete from the Bulk actions drop-down menu, then click Apply.
Note: If a plugin’s activated, it needs to be deactivated first. Otherwise, it won’t get deleted.
Change the Uncategorized Category
Now, if you forget to set a different category, having the default one on your blog will look unprofessional. Therefore, I recommend that you change it to something else, depending what your niche is.
Go to Posts > Categories, hover over the Uncategorized category, and click on Quick Edit.
Change the Name and Slug to something else. For example, finance and finance. The slug refers to the part of the URL that’s after the category base (e.g. https://example.com/category/other/).
Delete Pre-installed/Unused Themes
WordPress also comes with pre-installed themes by default. And, as I mentioned for plugins, different software or platforms that install WordPress for you can also add extra themes.
Except for the one you use and a default one, it’s best to delete them so you won’t be bugged with update notifications. They can also pose a security risk, even if they are deactivated. The same goes for plugins.
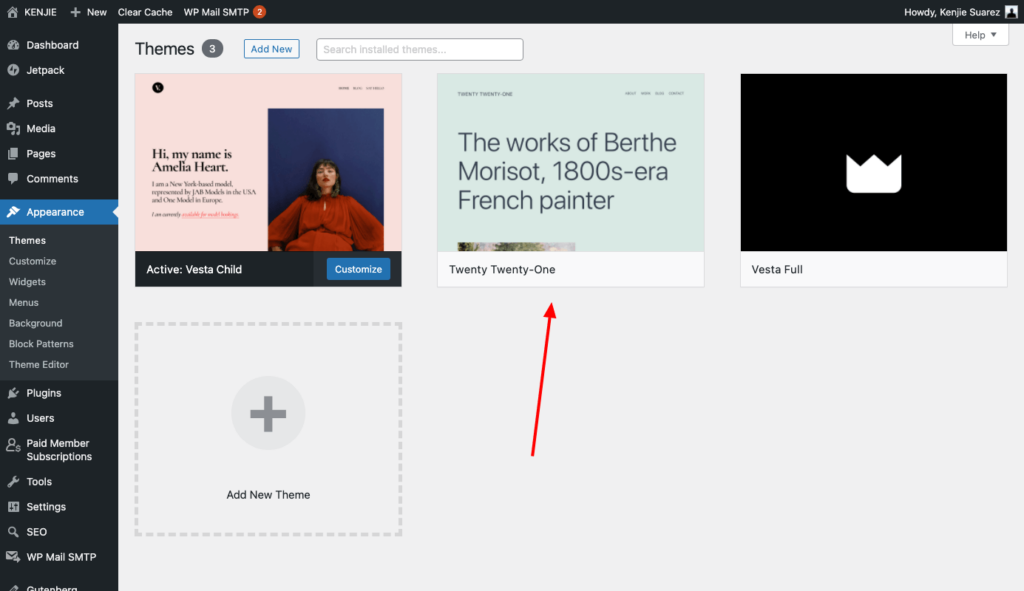
I highly recommend you leave one pre-installed FREE theme (twenty twenty-one). Delete all other preinstalled themes.
To delete unused WordPress themes, go to Appearance > Themes, hover over a deactivated theme, then click on Theme Details.
Notes:
- An Active theme can’t be deleted. You need to deactivate it first;
- WordPress always needs to have an active theme, which should be the one that you use;
- WordPress also recommends having a default theme installed, which will automatically be used if something goes wrong with yours. So, keep one of WordPress’ default themes installed (e.g. Twenty Twenty One);
- Usually, you should have a child theme in place. That’s the only case when you’ll need to have three themes available:
- The parent theme – deactivated, but not deleted;
- The child theme – activated;
- A default theme – deactivated, but not deleted.
Delete the Default Comment
WordPress also comes with a demo comment, which you can find in the Comments section. Hover over it and click on Trash.


